Tuesday 28 February 2017

Does Charlie like Dinosaurs?

When buying some fabric recently for a couple of baby quilts I want to make, I stumbled across the most amazing fabric shop online. Always Knitting and Sewing has quickly become my favourite place to buy fabric. They do beautiful bundles of fat quarters, quarter metre squares which are perfect for quilting. Their fabrics are great quality and really good value. On my latest visit I decided to buy a "surprise" pack of remnant fabric. 

Within the pack was a gorgeous piece of dinosaur fabric. My friend has a 2 year old son so I sent her a message saying "does Charlie like dinosaurs?". This photo was her reply...

Being quite a bit smaller than my last quilt, this one came together really quickly. I cut the material into 6inch squares and combined it with some blue and grey that I already had. I then decided to back it in a different dinosaur print, which clashed a bit, but in a really good way. 

The quilt turned out really well and ended up being the perfect size for a two year old. Today I took it to Charlie and in return he showed me the most adorable "dinosaur roar" impression😍



A grown up project


Having (semi) mastered the cape I wanted to challenge myself a bit more. On my trip to Eastleigh Sewing Centre I purchased a jelly roll to make a quilt for myself. This one was going to be bigger, more grown up and involve a bit more thought and planning. 

Instead of sewing the strips in a long line, like I had with my nieces quilt, I cut them into smaller strips and made squares of 3 strips. Once I had all of the squares I spent some time working out how I wanted them to sit together in the quilt. Had I been a bit braver I would have thought about using boarders within the quilt, but I decided to just to do straight patchwork.


When I finished sewing the squares together, the quilt wasn't quite as big as I had wanted it. As a beginner, I am still getting my head around how much fabric I need for things, especially things that I am not following a pattern for. There are lots of good books and web articles out there to help with this though. 
The finished quilt top was beautiful and I decided that I would put a thick edge around the outside in order to boost the size a bit. I had some cream fabric and some pink which I had used to create a few extra squares within the quilt, but I didn't have enough of either one to do the whole boarder, so I went with two sides pink and two in cream. I think it gives it a little something special.

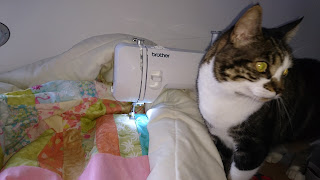
As this was a bigger quilt, the quilting aspect of it was hard work. When you are quilting down the quilt, you end up having to roll up as you go and push the excess through the machine, in the gap to the right of the needle...which isn't very big. The cat also likes to "help" with my sewing, by sitting right in front of my machine 😃


I was more prepared to put some time into the edging of this quilt, I had learnt from my previous attempts and although there were still some mistakes, it looks a lot better. I even managed to get my head around how to do corners, which is harder than you might think! 

My finished quilt is beautiful and I absolutely adore it. It fits the bed, but it is mainly for curling up under on the sofa with a cup of tea. 

Monday 27 February 2017

I am going to make a cape!

Having mastered my first quilts, I decided that I had this sewing lark down and brought a pattern to make myself a cape. It says very easy on the front so it can't be that hard right?...Wrong! 

The first challenge was finding the right fabric, I wanted it to be quite thick and warm, but manageable. At this point I knew nothing about fabric other than what jelly roll is. After a bit of research I discovered a lovely fabric shop in Eastleigh called Eastleigh Sewing Centre. The ladies in there were really friendly and helpful and didn't laugh too much when I got my threads confused and tried to by overlocker thread rather than the normal stuff (who knew they were even different!). 

I walked out of the shop with the right thread and with not only my cape fabric, but some more jelly roll and wadding for another quilt (more about that in a later post). My cape fabric was charcoal grey with a gorgeous silver thread running through it.

When I got home and opened the pattern packet, I was beyond confused. It looked so complicated and anything but easy. Luckily my mum was on hand to answer some really stupid questions...no matter how old we get, we still need Mum's advice 😀


I eventually figured out what the different bits of the pattern meant, how to cut it out and how to cut the fabric, and I even did it all the right way round! 


There is no better feeling than sewing your own piece of clothing, something you made yourself that you will actually wear. I made a few mistakes when sewing it and had to unpick a few seams, but I was super proud of it when I finished. 

It is far from perfect, but it is wearable and I absolutely love it. 

I learnt a lot of lessons along the way, mainly to take my time and be a bit more patient with myself. 


First Quilts

I got my sewing machine in mid December 2016 which is where my journey started. Never being one to shy away from a challenge I decided to jump straight in and make a quilt each as Christmas presents for my 2 nieces. 

Each quilt is made from 2 jelly rolls using the free Jelly Roll Quilt pattern from Hobbycraft. The pattern is really easy to follow and builds up the top layer of the quilt very quickly. Did I mention that is is also free, just download it from the website (or pick up the leaflet in store) and you are good to go. 

I also got the jelly rolls themselves from Hobbycraft, at £12 per roll it isn't the cheapest way to make a quilt, but it is very easy and very effective so it's a compromise. 

For the two quilts I used the following jelly rolls from Hobbycraft:

Hootenanny Bright Owl Rolled Fabric 

Symone Rolled Fabric Strips


The tops looked amazing when they were finished and I felt a real sense of achievement at how they had come together.  

Adding the wadding, backing and quilting made the quilts really come together and quilting in the ditch (along the seam) meant it really started to look like a quilt. 

I found the edging a challenge...I can be a bit gung ho and made a few mistakes with this. Luckily my gorgeous nieces didnt mind and it was so so lovely to see their happy faces and cries of "wow" on Christmas day.